Water Storage That Actually Lasts: Container Choice, Labeling, and Shelf-Life Tracking
Good water storage is boring in the best way. Learn which water containers hold up, how to label them, and how to track shelf-life without guessing.
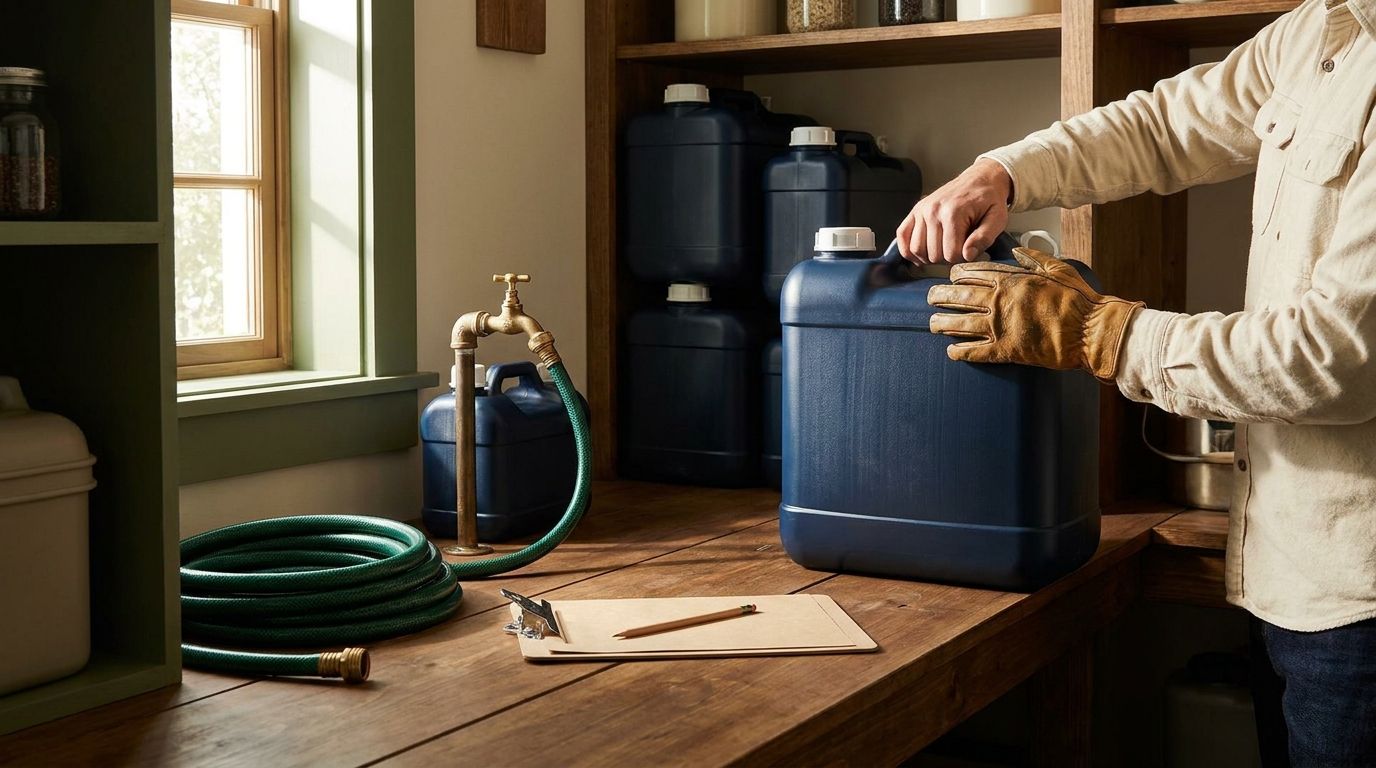
A gallon jug that looks fine can still fail you. The thesis is simple: water storage lasts when your containers are the right material, your labeling is clear enough to act on, and your shelf-life tracking is tight enough to prevent "mystery water."
Last Tuesday, in my garage, I found a stack of half-forgotten jugs behind a box of extension cords. The labels were faded. I could guess the month. I couldn't prove the year. That is exactly how people end up drinking water that was never meant to be used.
This guide walks you through water storage that actually lasts, with practical container choices, labeling that survives real life, and shelf-life tracking you can run like an inventory system. With Mainstay's adaptive learning system, you can keep your water inventory organized and update it on a schedule that matches how your household actually works.
Answer first: what makes water storage last?
You get long-lasting water storage when you control three variables: the container material, the container condition, and the tracking. Most failures come from the container, not the water.
Use water containers made for storage, keep them out of heat and sunlight, and label them with a date you can read months later. Then track shelf life like you track batteries: you know when to rotate, and you do it.
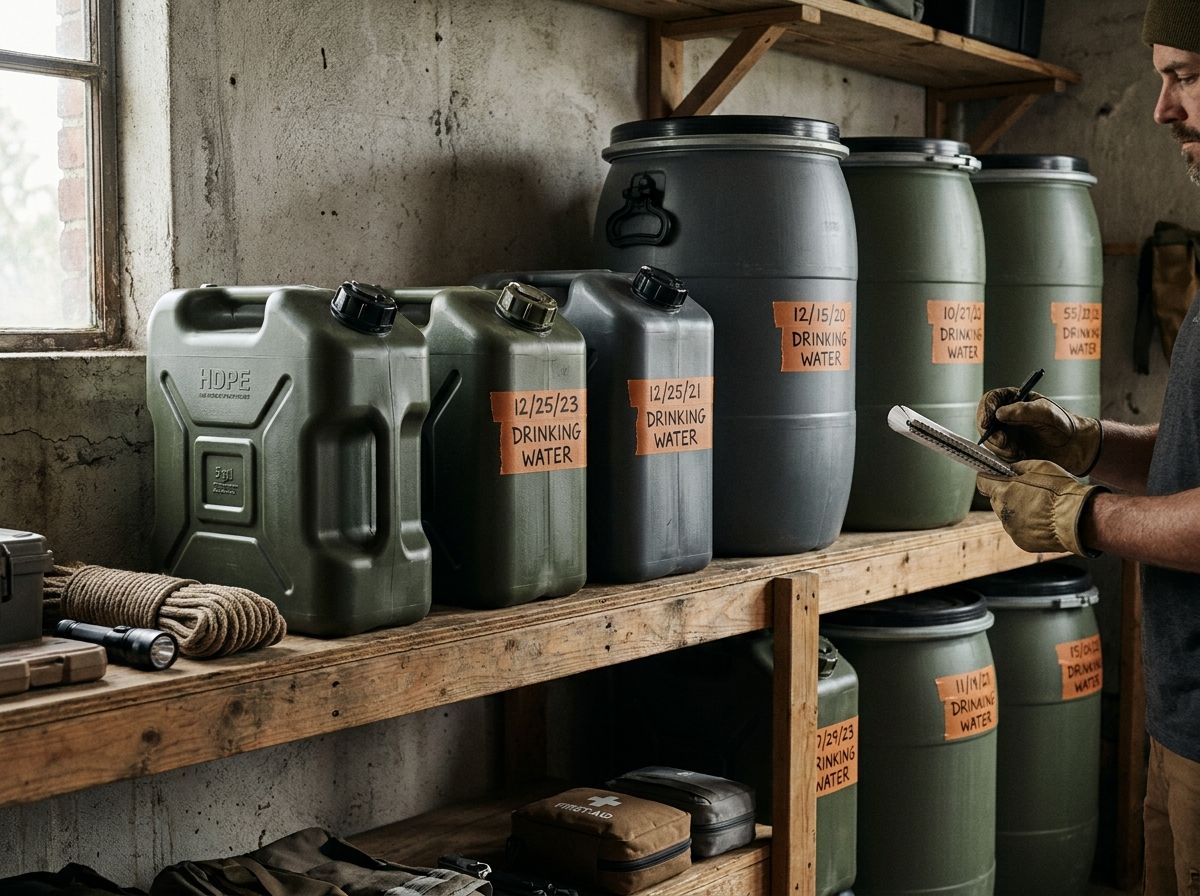
The quick rule you can follow today
If you can't identify what you stored, when you stored it, and what you're rotating out, you don't have water storage. You have water clutter.
1) Container choice: the material decides how long it stays trustworthy
Water containers are not all the same. Some are fine for short-term use, but they break down faster than you'd expect. Heat, UV exposure, and repeated handling all stress plastics and seals, and if you store in the wrong container, you end up replacing jugs more often than you planned.
Here are the container types that tend to work best for water storage, and the ones that usually disappoint:
- Food-grade HDPE (high-density polyethylene) jugs and tanks are built for chemical stability and long-term storage. They resist common breakdown better than many general-purpose plastics.
- Glass is stable and inert, but it is heavy and breaks. Use it only if you can protect it.
- Stainless steel is stable and durable, but you still need a lid that seals well and a storage area that avoids dents.
- Avoid unknown plastics, thin beverage bottles, and anything that once held chemicals. The plastic may absorb odors or leach compounds.
A practical example from the Midwest: In April, a friend named Mark in Des Moines stored water in old detergent bottles "because they looked clean." Two months later, the water smelled like detergent residue, even after rinsing. The container had absorbed the odor, and the water storage failed because the container material was never meant for water.
A second scenario, this one from the coast: In Virginia Beach, heat and humidity are constant. A prepper named Carla kept water in an outdoor shed. The jugs were "fine" at first. After a summer, the caps loosened and the plastic scuffed. She ended up rotating early because she couldn't trust the containers.
And one more, from a small apartment: In Phoenix, there's no cool basement to fall back on. A guy named Luis in a one-bedroom condo used an indoor closet and rotated on schedule. His containers lasted because the storage conditions were controlled, not because he got lucky.
What to look for when you buy water containers
When you pick water containers, check these points before you fill:
1. The container is marketed for water storage or is food-grade and designed for potable water.
2. The cap seals tightly and doesn't wobble.
3. The container is free of cracks, cloudy plastic, or deep scratches.
4. You can label it and keep the label readable.
If you store water in a place that swings from 30°F in winter to 110°F in summer, container choice matters even more. Heat speeds plastic aging. UV speeds it too.
2) Fill and handling: keep water clean at the start
Container choice is only half the story. Your handling at fill time sets the baseline for quality. Fill a container with a dirty funnel, or leave a cap off too long, and you're starting with a problem before the water even goes on the shelf.
Use clean tools. Wash the container if you reuse it. Rinse it well. Let it dry before filling if you're washing with soap. Then fill with water that is safe to store.
If you are filling from a tap, treat the water first using safe water purification methods you trust. This article focuses on storage, not purification. Still, the logic is the same: if the water is not safe at fill time, storage will not fix it.
Handling practices that prevent the common failures
- Fill in a clean area. Avoid filling near chemicals, gasoline cans, or dusty workbenches.
- Keep caps closed immediately. Don't leave containers open "just for a minute."
- Don't stack heavy items on top of filled jugs. Pressure stresses caps.
- Avoid repeated opening and closing unless you are actively rotating.
One detail people miss: condensation. If you store containers in a space where temperature drops below the dew point, you can get moisture on the outside. That moisture can creep into seams if caps are not sealed well.
What about "refilling" old jugs?
You can reuse some containers, but you need a system. If a jug has been in service, has a worn label, or shows scuffs at the cap, it is a candidate for retirement. That's not waste. That's quality control.
In my own setup, I keep two categories: "in rotation" and "backup." In rotation jugs get used and refilled. Backup jugs stay sealed until rotation time. That prevents the constant churn that damages containers.
3) Labeling that survives real life: so you can rotate without guessing
Labeling is where water storage becomes an actual system. You want labels that answer three questions at a glance: what it is, when it was filled, and when it needs rotation.
If your label fades, you lose the ability to track shelf life. If your label is vague, you lose the ability to act. If your label is messy, you lose time.
A labeling format that works
Use a label that includes:
- "Potable water" or a clear descriptor
- Fill date (month and year works for most households)
- Rotation due date (or "rotate by" date)
- Container type (optional, but helpful if you have multiple sizes)
Example label text you can copy:
"Potable water - Filled 2026-06 - Rotate by 2027-06 - 5 gallons, HDPE"
Write it in a way you can read while holding the jug. Then add a second layer: marker on the cap or shoulder of the jug, plus a label on the front.
Label materials that don't lie
You need label materials that resist water, scuffs, and heat. A label that looks good in the store can peel when the container warms up.
A simple test: stick your label on an empty container and leave it in your storage area for a week. If it lifts or smears, switch materials.
The moment labeling saves you
Picture this: Saturday morning, making coffee, the power flickers. You grab your water storage and see a row of jugs with blank caps. Your brain tries to reconstruct the timeline, and your brain is not a reliable calendar.
Now picture the opposite. The labels say "Rotate by" and the dates match your inventory list. You grab the right jugs first, and you plan replacement without scrambling.
With Mainstay's adaptive learning system, you can link each container batch to a rotation date so your water inventory stays current. No spreadsheet heroics required.
4) Shelf-life tracking: treat water like supplies, not like a miracle
Water has two different "shelf-life" realities. The water itself can remain usable for a long time if stored properly. The container and the seal are what usually create the real-world limit.
So your shelf-life tracking should cover both: container condition and rotation schedule. Even if water remains safe, you still rotate to keep your system reliable.
What shelf-life tracking should include
At minimum, track these fields per batch:
- Fill date
- Estimated rotation date
- Container type and size
- Storage location (garage closet, basement shelf, under-bed bins)
- Condition notes (cap tightness, label readability)
That last part matters. If a label is unreadable, you already lost tracking. If the cap is loose, you already have a risk.
How often should you rotate?
Many prep guides use a 6- to 12-month rotation window for stored water, depending on container type and storage conditions. The practical approach is to pick a rotation period you can actually maintain, then stick to it.
If you store in a cool, stable indoor area using proper HDPE containers with tight caps, a longer rotation period can work. If you store in heat or you reuse containers that have been opened, you rotate sooner.
The data point that keeps coming up in common guidance is that container condition changes faster than people expect. Heat accelerates plastic aging. Seals degrade over time. That is why shelf-life tracking is really about container reliability.
A concrete tracking setup that doesn't break
Use one of these systems:
- Paper log in a binder near your supplies
- A simple spreadsheet with batch entries
- A phone note with photo labels and rotation dates
The key is consistency. Tracking fails when it lives in a place you don't check.
Here's a scenario that shows why: In a suburb outside Denver, a prepper named Ryan kept water in five-gallon jugs. He tracked fill dates in his head. Then he moved houses. He found the jugs later in a different closet, couldn't confirm fill dates, and replaced them all. The cost wasn't the worst part. The worst part was the time.
In his new system, he keeps a single "Water Inventory" card in a clear sleeve on the same shelf where the jugs live. He updates it during rotation day.
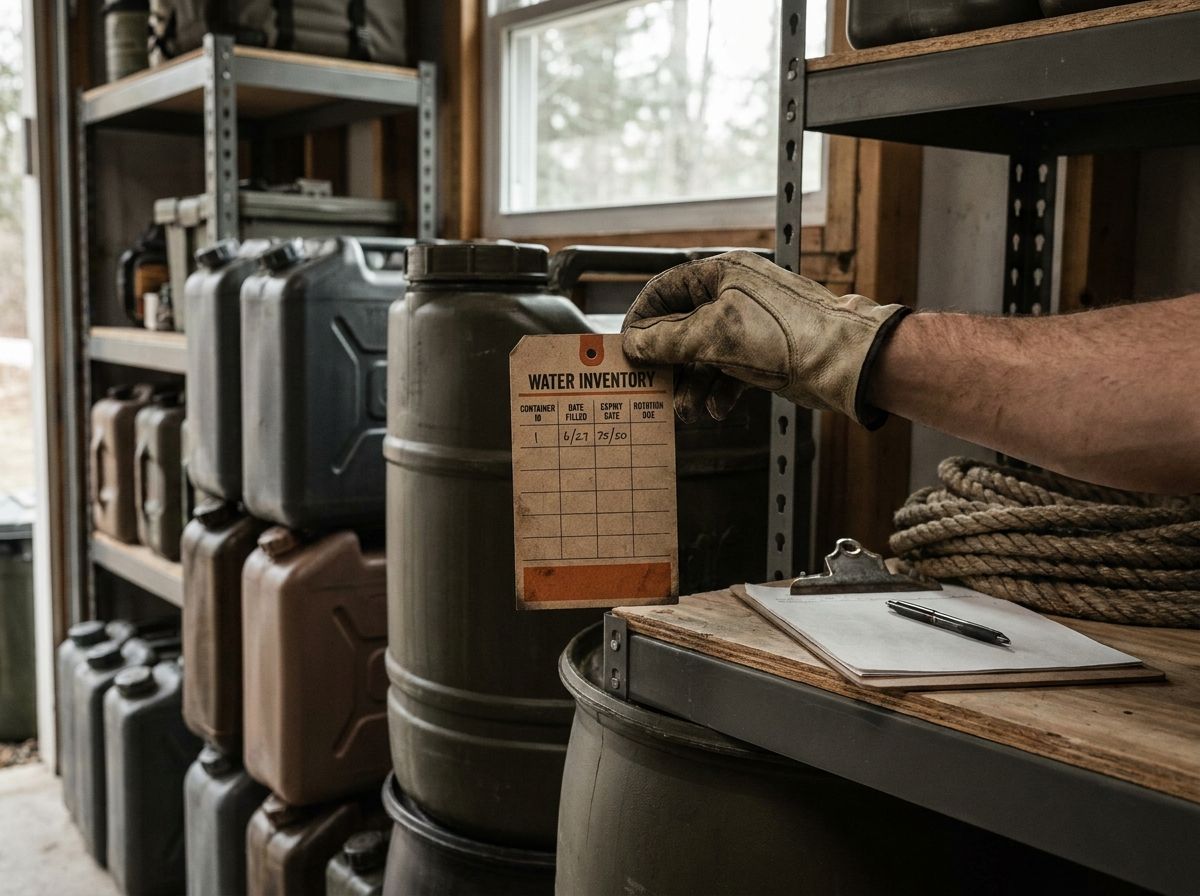
5) Storage conditions: heat, light, and handling are the real shelf-life multipliers
You can buy the right water containers and still burn through shelf life if you store them in a harsh environment. Heat and UV are the two biggest enemies. Even indoor storage can be brutal if it sits near a furnace closet or in a sunlit room.
The best storage conditions are boring: cool, dark, dry, and stable.
Place selection: where to store water containers
Choose a location that:
- stays relatively cool year-round
- avoids direct sunlight
- avoids chemical fumes (gasoline, solvents, paint)
- avoids temperature swings near exterior doors
If you have to store in a garage, keep containers on interior shelves, not on the floor. Floors swing more with temperature. Store away from water heaters.
Handling: reduce cap stress
Every time you move a jug, you stress the cap and seams. That doesn't mean never move it. It means you plan movement around rotation and use.
Use a tote system for smaller containers. For larger jugs, keep them in a stable rack or on a shelf that prevents tipping.
Check containers during rotation
During your rotation day, inspect:
- cap tightness
- label readability
- any warping, cloudiness, or cracks
- scuffs near the cap seal
If you see issues, retire the container. Don't "hope it holds." Water storage is not the place for hope.
6) A water inventory workflow you can run in one hour per month
You don't need a complicated system. You need a workflow you can repeat.
Here's a workflow that takes about an hour per month for a typical household with several containers.
Step-by-step workflow
1. Check your water storage area for containers with unreadable labels or damaged caps.
2. Compare what you see to your water inventory list.
3. Confirm rotation dates. If you're within two weeks of "rotate by," schedule rotation.
4. Take a quick photo of each label batch and store it in your phone notes (optional, but handy).
5. Update the inventory log right after you rotate.
That workflow keeps you from doing the classic prepper move: buying more because you can't find what you already have.
Three scenarios where this workflow pays off
- The "forgotten closet" scenario: You find three jugs behind a vacuum. Labels are readable. You rotate the right ones without guessing.
- The "new baby arrival" scenario: A household gets busy and skips weeks. The workflow catches it because it runs monthly, not yearly.
- The "power outage week" scenario: You need water now. You already know which batches are closest to rotation, and you can plan replacement while using what you have.
And yes, you will still make mistakes sometimes. I have. You just don't want the mistakes to be silent.
With Mainstay's adaptive learning system, you can tie your water inventory to a schedule and keep your rotation dates visible. That reduces the mental load and keeps the system moving even when life gets loud.
FAQ
How long does water storage last?
Water stored in sealed, food-grade containers typically stays usable for a long time, especially when stored cool and out of sunlight. The practical limit usually comes from container and seal condition rather than the water itself. That is why a rotation schedule and container inspections matter.
What water containers should I use for long-term storage?
Use water containers made for potable water storage, commonly food-grade HDPE jugs or tanks with tight, reliable caps. Avoid unknown plastics and containers that held chemicals or strong odors. If the container shows cloudiness, cracks, or cap issues, replace it.
Do I need to label every water container?
Yes. Labeling is what turns stored water into a usable inventory. At minimum, include the fill date and a rotation due date so you can act without guessing.
How do I track shelf life without a spreadsheet?
Use a single inventory card in your storage area plus a monthly check. Write batch details on the card and update it right after rotation. If you prefer digital, store photos of labels in a phone note and keep the rotation dates on the same note.
What should I check during rotation day?
Inspect cap tightness, container condition, and label readability. Look for warping, cloudiness, cracks, or scuffs near seals. If any of those show up, retire the container and replace it.
Takeaway: make water storage boring and reliable
Pick the right water containers, label them so you can read them months later, and run shelf-life tracking on a schedule you can keep. Your next step is simple: choose one storage location, write a water inventory list for everything you already have, and set rotation dates based on your container conditions.
Then do the one-hour monthly workflow. That's how water storage stays trustworthy when you need it.
Want this handled automatically? See the Mainstay membership.
Subscribe to comment
Join the Mainstay newsletter to leave a comment — and get new field notes in your inbox.
Get new field notes in your inbox
Practical, calm preparedness — one useful note at a time.